Basics: Five Questions about Filter Response

By Craig Anderton 

You can think of filters as combining amplification and attenuation—they make some frequencies louder, and some frequencies softer. Filters are the primary elements in equalizers, the most common signal processors used in recording. Equalization can make dull sounds bright, tighten up “muddy” sounds by reducing the bass frequencies, reduce vocal or instrument resonances, and more. 

Too many people adjust equalization with their eyes, not their ears. For example, once after doing a mix I noticed the client writing down all the EQ settings I’d done. When I asked why, he said it was because he liked the EQ and wanted to use the same settings on these instruments in future mixes. 

While certain EQ settings can certainly be a good point of departure, EQ is a part of the mixing process. Just as levels, panning, and reverb are different for each mix, EQ should be custom-tailored for each mix as well. Part of this involves knowing how to find the magic EQ frequencies for particular types of musical material, and that requires knowing the various types of filter responses used in equalizers. 

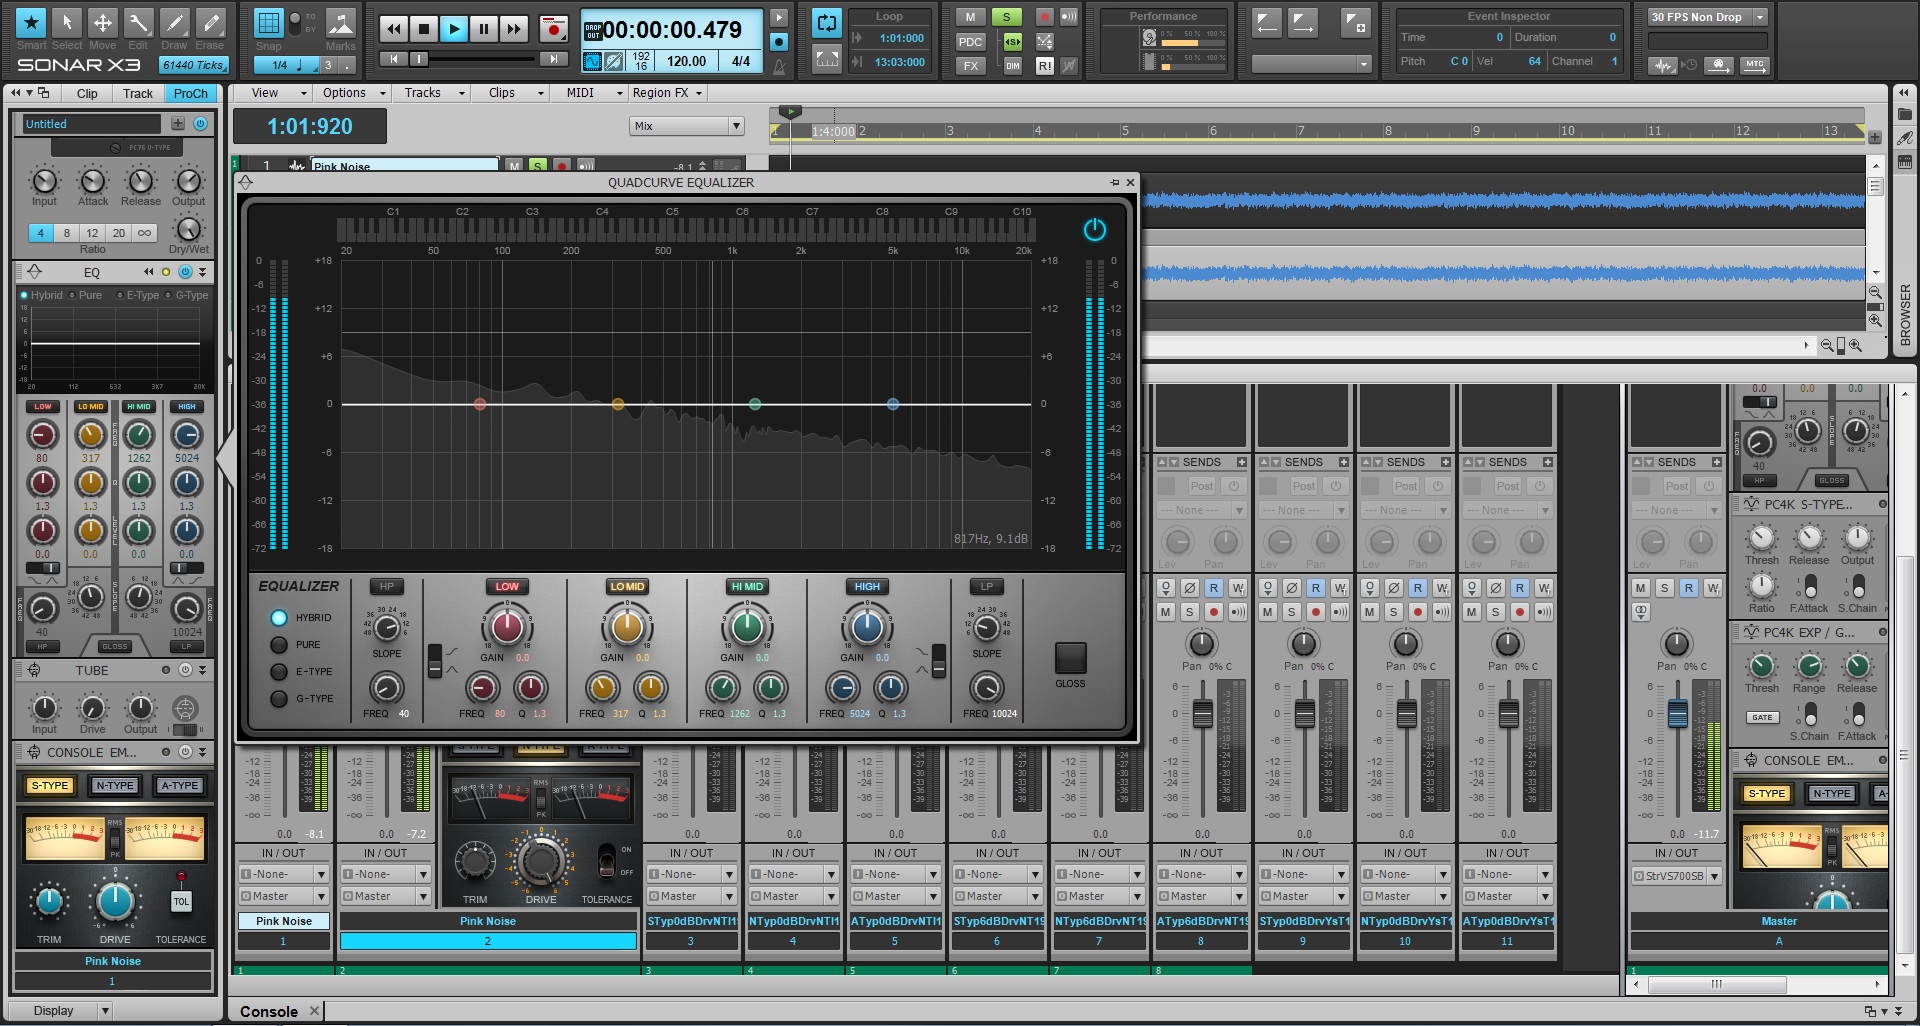
What’s a lowpass response? A filter with a lowpass response passes all frequencies below a certain frequency (called the cutoff or rolloff frequency), while rejecting frequencies above the cutoff frequency (Fig. 1). In real world filters, this rejection is not total. Instead, past the cutoff frequency, the high frequency response rolls off gently. The rate at which it rolls off is called the slope. The slope’s spec represents how much the response drops per octave; higher slopes mean a steeper drop past the cutoff. Sometimes a lowpass filter is called a high cut filter.

 Fig. 1: This lowpass filter response has a cutoff of 1100 Hz, and a moderate 24/dB per octave slope.

What’s a highpass response? This is the inverse of a lowpass response. It passes frequencies above the cutoff frequency, while rejecting frequencies below the cutoff (Fig. 2). It also Continue reading “Basics: Five Questions about Filter Response”

Basics: Five Questions about Latency and Computer Recording

Get the lowdown on low latency, and what it means to you

By Craig Anderton 

Recording with computers has brought incredible power to musicians at amazing prices. However, there are some compromises—such as latency. Let’s find out what causes it, how it affects you, and how to minimize it.  

1. What is latency? When recording, a computer is often busy doing other tasks and may ignore the incoming audio for short amounts of time. This can result in audio dropouts, clicks, excessive distortion, and sometimes program crashes. To compensate, recording software like SONAR dedicates some memory (called a sample buffer) to store incoming audio temporarily—sort of like an “audio savings account.” If needed, your recording program can make a “withdrawal” from the buffer to keep the audio stream flowing. 

Latency is “geek speak” for the delay that occurs between when you play or sing a note, and what you hear when you monitor your playing through your computer’s output. Latency has three main causes: 

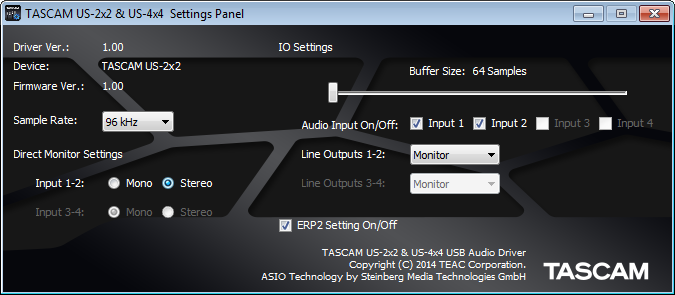
  • The sample buffer. For example, storing 5 milliseconds (abbreviated ms, which equals 1/1000th of a second) of audio adds 5 ms of latency (Fig. 1). Most buffers sizes are specified in samples, although some specify this in ms. 

 Fig. 1: The control panel for TASCAM’s US-2×2 and US-4×4 audio interfaces is showing that the sample buffer is set to 64 samples. 
  • Other hardware. Converting analog signals into digital and back again takes some time. Also, the USB port that connects to your interface has additional buffers. These involve the audio interface that connects to your computer and converts audio signals into digital signals your computer can understand (and vice-versa—it also converts computer data back into audio).
  • Delays within the recording software itself. A full explanation would require another article, but in short, this usually involves inserting certain types of processors within your recording software. 

2. Why does latency matter? Continue reading “Basics: Five Questions about Latency and Computer Recording”

Optimizing Vocals with DSP

Optimizing tracks with DSP, then adding some judicious use of the DSP-laden VX-64 Vocal Strip, offers very flexible vocal processing. 

By Craig Anderton 

This is kind of a “twofer” article about DSP—first we’ll look at some DSP menu items, then apply some signal processing courtesy of the VX64—all with the intention of creating some great vocal sounds. 

PREPPING A VOCAL WITH “MENU” DSP 

“Prepping” a vocal with DSP before processing can make the processing more effective. For example, if you want to compress your vocal and there are significant level variations, you may end up adding lots of compression to accommodate quiet parts. But then when loud parts kick in, the compression starts pumping. 

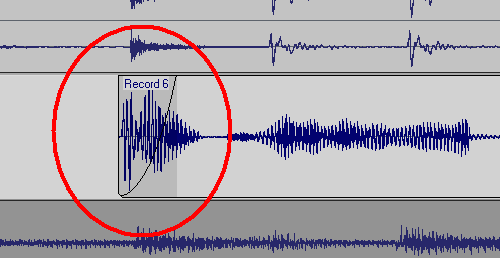
Here’s another example. A lot of people use low-cut filters to banish rogue plosives (e.g., a popping “b” or “p” sound). However, it’s often better to add a fade-in to get rid of the plosive; this retains some of the plosive sound, and avoids affecting frequency response. 

Adding a fade-in to a plosive can get rid of the objectionable section while leaving the vocal timbre untouched. 

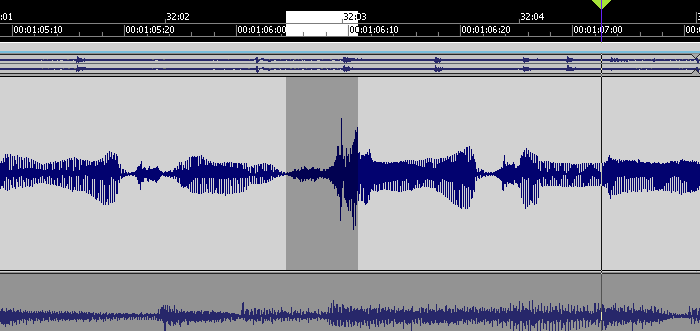
Also check if any levels need to be evened out, because there will usually be some places where the peaks are considerably higher than the rest of the vocal, and you don’t want these pumping the compressor either. The easiest fix is to select a track, drag in the timeline above the area you want to edit, then go Process > Apply Effect > Gain and drop the level by a dB or two. 

This peak is considerably louder than the rest of the vocal, but reducing it a few dB will bring it into line. 

Also note that if you have Melodyne Editor, you can use the Percussive algorithm with the volume tool to level out words visually. This is really fast and effective. 

While you’re playing around with DSP, this is also a good time to cut out silences, then add fadeouts into silence, and fadeins up from silence. Do this with the vocal soloed, so you can hear any little issues that might come back to haunt you later. Also, sometimes it’s a good idea to normalize individual vocal clips up to –3dB or so (leave some headroom) so that the compressor sees a more consistent signal. 

The clip on the left has been normalized and faded out. The silence between clips has been cut away. The clip on the right fades in, but has not been normalized. 
With DSP processing, it’s good practice to work on a copy of the vocal, and make the changes permanent as you do them. The simplest way to apply Continue reading “Optimizing Vocals with DSP”

The Art of Transient Shaping with the TS-64

Understand this often-misunderstood processor, and your tracks will benefit greatly 

By Craig Anderton 

Transient Shapers are interesting plug-ins. I don’t see them mentioned a lot, but that might be because they’re not necessarily intuitive to use. Nor are they bundled with a lot of DAWs, although SONAR is a welcome exception. 

I’ve used transient shaping on everything from a tom-based drum part to make each hit “pop” a little more, to bass to bring out the attacks and also add “weight” to the decay, to acoustic guitar to tame overly-aggressive attacks. The TS-64 has some pretty sophisticated DSP, so let’s find out how to take advantage of its talents.

But first, a warning: transient shaping requires a “look-ahead” function, as it has to know when transients are coming, analyze them, filter them, and then calculate when and how to apply particular amounts of gain so it can act on the transients as soon as they occur. As a result, simply inserting the TS-64 will increase latency. If this is a problem, either leave it bypassed until it’s time to mix, or render the audio track once you get the sound you want. Keep an original of the audio track in case you end up deciding to change the shaping later on. 

TS-64 TRANSIENT SHAPER BASICS

A Transient Shaper is a dynamics processor that modifies only a signal’s attack characteristics. If there’s no defined transient the TS-64 won’t do much, or worse yet, add unpleasant effects. 

Transient shapers are not just for drums—guitars, electric pianos, bass, and even some program material are all suitable for TS-64 processing if they have sharp, defined transients. And it’s not just about making transient more percussive; you can also use the TS-64 to “soften” transients, which gives a less percussive effect so a sound can sit further back in a track. 

There are two main elements to transient shaping. The first is Continue reading “The Art of Transient Shaping with the TS-64”

Choosing the right compressor in SONAR X3 (Producer & Studio)

What is Compression?

Compression is a massively useful tool for pro audio applications. As a simultaneous corrective and creative utility suitable for both tonal shaping and controlling levels,  a compressor is one of the most important pieces of gear in your sonic toolbox.

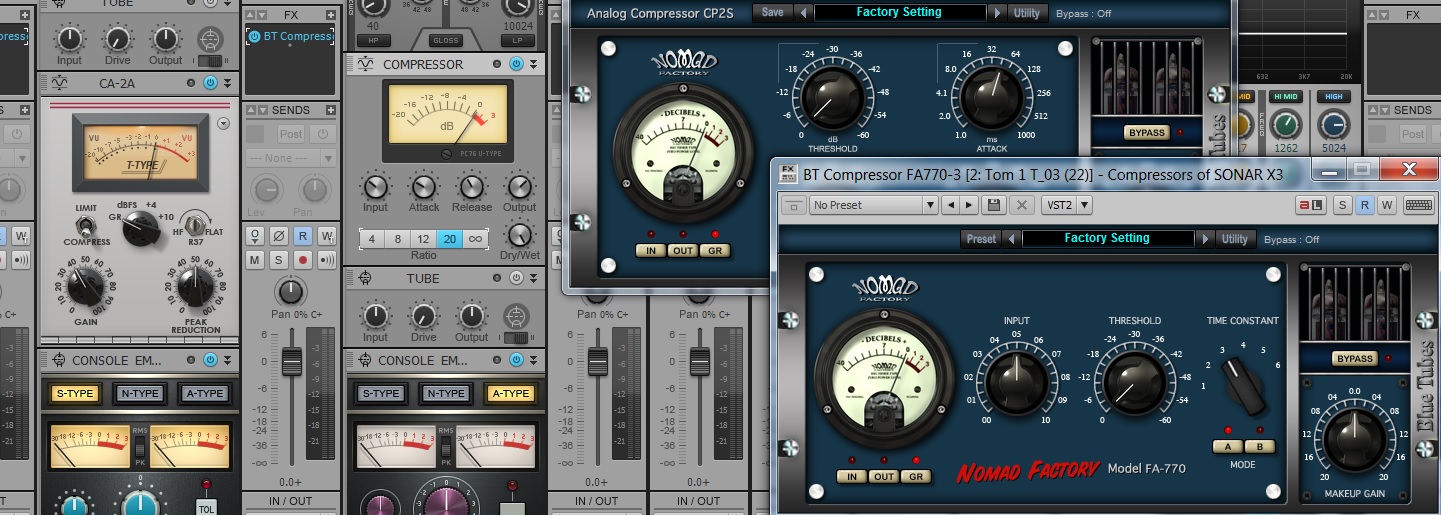
Instead of explaining the history and value of knowing all the different types of compressors that exist, we’re just going to dive in and show you how to get results. Once you understand this you’ll be able to grasp the larger picture of compression and the many different circuits and types. SONAR X3 Studio & Producer come packed with quite a few different types of compressors, so let’s open them up and take a look.

PC76 U-Type

Modeled after one of the most classic leveling amplifiers in history, the PC76 U-Type is a go-to compressor for Continue reading “Choosing the right compressor in SONAR X3 (Producer & Studio)”

The Sound of Console Emulation in SONAR X3

The age of hybrid studios

The day has come where digital audio has caught up to the analog trends of the pre-xyz age. Hybrid (digital/analog) home-studios are more common and the need for more analog flavored plugins is a must. Cakewalk has harnessed these trends in some of the latest software additions to the X-series with their track by track Console Emulation ProChannel plugin.

At a glance

Simplicity is one of the key ingredients in the world of plugin interfaces and the Console Emulator is no stranger to that. It’s an easy tool to use, just turn up the Drive! Each algorithm has the same 3 parameters for locking in the sound, Drive, Tolerance, and Trim. Each version of the plugin reflects the circuitry of 3 classic large format console from the past 30 years. Every board has it’s own sound because each circuit is completely different than the other.

Let’s take a closer listen 

For most part, Console Emulation is about subtle character. If you apply subtle changes to your entire mix it will collectively sound different. One track may not sound all that different in the final mix, but if you apply this effect to the entirety of your session, well then you’ll probably start to hear some differences. These DSP algorithms are tuned Continue reading “The Sound of Console Emulation in SONAR X3”

How To Create Melodies From Audio Loops with SONAR X3 & Melodyne Editor

by Dan Gonzalez 


Introduction

In modern EDM music you’ll see the use of audio loops everywhere. These could be created by a third party or by the person writing the music. It doesn’t matter, but what does matter is the music you create with those loops and how you construct them in a way that brands your own sound.

Do yourself a favor and check out Melodyne Editor. You can analyze and edit polyphonic data easily – and with SONAR X3 you can use this data to enhance and inspire the creation of new and innovative melodies for your music. Continue reading “How To Create Melodies From Audio Loops with SONAR X3 & Melodyne Editor”

AD2: Pitch Envelopes and much more than just drum samples

by Dan Gonzalez

Yes, that’s right. You may think that Addictive Drums is just a simple sample player but it’s actually an impressive tool for sound design. XLN Audio has the program set so that you can only use the sounds they publish. BUT, the engine that processes these sounds is so powerful that you can virtually get any sound you could ever need from the drums they supply.

Next time you are in Addictive Drums check out the Edit section within this program and brace yourself. There are tons Continue reading “AD2: Pitch Envelopes and much more than just drum samples”

Virtual Instruments: 5 Tips For The Z3TA+ Junkie

Here are some of our favorite Z3TA+ tips and videos from our archive:

1. EDM Production – Enhance Your Drums with Z3TA+ 2

  • Insert two instances of Z3TA+ 2.
  • Copy your drum sequence to both Z3TA+ 2 tracks.
  • Isolate the Kick on one track and the Snare on the other.
  • Setup the first Z3TA+ 2 to generate a Sine Wave for the Kick.
  • Setup the second Z3TA+ 2 to generate White Noise for the Snare.
  • Adjust the Amplifier Envelope to match the duration of each hit.
  • Within Z3TA+ 2 add Reverb, Compression, and EQ.
  • Mix in under your existing Drum Loop.

2. How to Customize Z3tA+ 2’s Stock Arpeggios

Z3TA+ 2 comes packed with a massive pool of MIDI programs that power it’s internal Arpeggiator, but why stick to the stock programs when you can make your own?

Here’s how:

  • Open Z3TA+2 and activate the Arpeggiator Section
  • Right-Click on the sequence in the arpeggiator and make sure the following are checked
  • Auto Disable Pattern When Dragged to Host
  • Auto Fit Patterns to One Measure When Loaded
  • Load one of the Arpeggios from the Pattern menu
  • Drag and Drop the Arpeggios right into SONAR X2
  • Edit the MIDI Clip to your liking
  • Go to File > Save As
  • Select MIDI 0 in “Save as type”
  • Go to C:\Cakewalk Content\Z3TA+ 2\MIDI Arpeggios and Save it
  • Load it into Z3TA+2′s Arpeggiator by going to Pattern > Load MIDI File…

3. How to create a bass synth with Z3tA+ 2

Who doesn’t like bass? Especially synth bass. Z3TA+ 2 is the answer to all of your sound design needs especially when you are looking to improve your production in the low end. I’ve put together a short tutorial on how to make a simple bass synth inside of Z3TA+2. Once you understand how everything works together you’ll be able to really start to make this plugin work for you.

Picking the right Oscillators

Within Z3TA+2 the first section you need to start working with is the OSC section. First I’ve selected two different square waves for OSC 1 and 2. They were Vintage Square 1 and Vintage Square 2. When creating a bass synth you need to make sure that your patch will not break up in the low end so be sure not to drop the octaves on the individual oscillators too low. I typically set mine to -2 at the most. Once you get to a certain range the instrument will sound weak and lose it’s driving Bass Synth sound

[READ THE REST OF THE TIP HERE]

4. [VIDEO] Digital Sound Factory Z3TA+  Sound Design

5. [VIDEO] Mixing and Mastering a song using only the Z3TA+ effects engine in SONAR

Recording Virtual Synthesizers: The Art of Imperfection

Synths can make perfect sounds…but is that always a perfect solution?

by Craig Anderton

Recording a virtual instrument is simple…you just insert it, hit a few keys, and mix it in with the other tracks. Right?

Well…no. Synthesizers are musical instruments, and you wouldn’t mic a drum set by taking the first mic you found and pointing it the general direction of the drummer, nor would you record an electric guitar by just plugging it into a mixing console. A little extra effort spent on avoiding an unnatural sound when mixing synths with acoustic instruments, improving expressiveness, tightening timing inconsistencies, and other issues can help you get the most out of your virtual instruments.

But first, remember that “rules” were made to be broken. There is no “right” or “wrong” way to record, only ways that satisfy you to a greater or lesser degree. Sometimes doing the exact opposite of what’s expected gives the best results. So take the following as suggestions, not rules, that may be just what the doctor ordered when you want to spice up an otherwise ordinary synth sound.

THE SYNTHESIZER’S SECRET IDENTITY

The paramount aspect of recording a synth is to define the desired results as completely as possible. Using synths to reinforce guitars on a heavy metal track is a completely different musical task from creating a all-synthesized 30-second spot. Sometimes you want synths to sound warm and organic, but if you’re doing techno, you’ll probably want a robot, machine-like vibe (with trance music, you might want to combine both possibilities).

So, analyze your synth’s “sonic signature”—is it bright, dark, gritty, clean, warm, metallic, or…? Whereas some people attach value judgements to these different characteristics, veteran synthesists understand that different synthesizers have different general sound qualities, and choose the right sound for the right application. For example, although Cakewalk’s Z3TA+ is highly versatile, to my ears its natural “character” is defined, present, and detailed.

Regarding sonic signatures, perhaps one of the reasons for a resurgence in analog synths sounds is digital recording. Analog synths tended to use low-pass filters that lacked the “edgy” sound of digital sound generation. Recording the darker analog sounds on analog tape sometimes resulted in a muddy sound; but when recording on digital, analog sounded comparatively sweet. Digital also captured all the little hisses, grunts, and burps that characterized analog synths. This is a case where the “imperfections” of analog and the “perfection” of digital recording complemented each other.

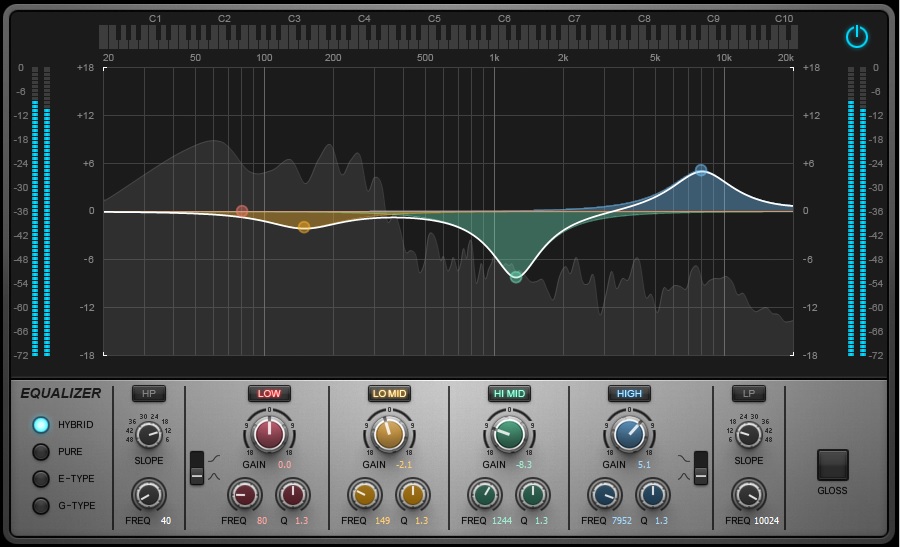
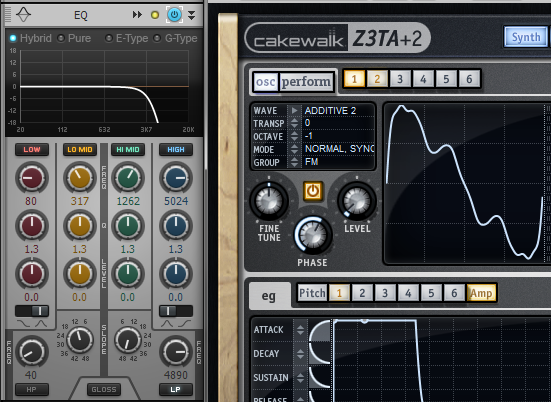
Another thought: look at guitars, voices, pianos, etc. on a spectrum analyzer, and you’ll note there is little natural high end. If you’re trying to blend a virtual instrument in with physical instruments, remember that a virtual synth has no problems obtaining a solid high end. Using the ProChannel’s LP filter set to 48dB/octave and lowering the frequency just a little bit can introduce the “imperfection” that matches the spectral characteristics of “real” acoustic and electric instruments more closely, so the synth seems to blend in better with the other tracks (Fig. 1).

Fig. 1: The ProChannel QuadCurve EQ’s lowpass filter can help digital synths sit better in tracks that use multiple physical or acoustic instruments. Continue reading “Recording Virtual Synthesizers: The Art of Imperfection”