by Daniel Gonz
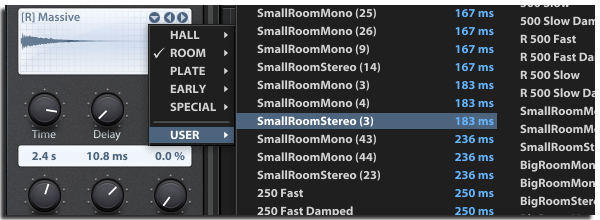
We’d like to release an impulse pack that we created last year in New York City. This free impulse response pack captures the simple ambience of two fantastic live rooms for drums, vocals, and pretty much any acoustic instrument you can imagine. Drop them into your choice of any convolution reverb to add depth to the elements of your mix.
The Dynamic Gate | A Cleaner Way To Mix Drums
by Daniel Gonz
Gates are wonderful processors that can clean up background noise and bleed in your audio tracks. They’re a bit tricky to understand because the key to successfully using one is often a specific feature that’s hidden or buried in the interface. The feature I’m referring to is called the sidechain. It’s a powerful element of my mixing workflow and I’d like to show you why.
To follow along with this post, you can download the audio examples here.
In its simplest form, a gate allows a signal to pass through it only when its decibel level is above a set threshold. This means the gate is ‘open’. If the signal falls below the threshold then no signal is allowed to pass. This means the gate is ‘closed’. The sidechain becomes an integral part of this entire process because it’s what the gate uses to detect whether or not the signal is above or below the set threshold.
Continue reading “The Dynamic Gate | A Cleaner Way To Mix Drums”
CakeTV Live Ep 4 – Mixing Drums in SONAR Part 1
HOW The Duke Western USES SONAR TO CREATE MUSIC FOR DUCK DYNASTY (AND MORE)
 Here at Cakewalk we are fortunate to have an external team of rocket scientists who help test out SONAR beta releases. This team is dedicated, passionate and most of all appreciated by all of us internally here at the Cake shop. Recently I received a general email from one of my esteemed colleagues mentioning that one of our trustworthy beta soldiers was jumping off the beta-battlefield in lieu of another SONAR related activity. Huh? This peaked my curiosity and I felt obliged to dig a bit deeper on the subject. What could “another SONAR related activity” involve? SONAR Olympics? SONAR CPU Racing? SONAR Academy?
Featured Music Placements on Discovery Channel, History Channel, CBS, Bravo Network
Continue reading “HOW The Duke Western USES SONAR TO CREATE MUSIC FOR DUCK DYNASTY (AND MORE)”
Anatomy of a Project: A Nontraditional Approach to a Commercial Recording
By Jimmy Landry
 Last summer, Peppina—a young female artist from Finland— plunged herself into the NYC music scene for two months. With the help of renowned NYC entertainment attorney Steven Beer who discovered her, she managed to head back to Finland with a major-label sounding EP. The project was recorded in different ways, in different locations all over the city—and with budgets being slashed, these days it’s pretty much hand-to-hand combat when making a low budget recording where anything goes. But the upshot is yes, you can record a commercial-sounding record on a budget—so here are some of the techniques we employed to accomplish that goal. SONAR Platinum was instrumental in saving time on this EP. Between the Drum Replacer, VocalSync, onboard Melodyne, Speed Comping and general speed enhancements, I got to the finish line a lot faster than previous records. I highly recommend anyone who’s on SONAR XX to take a close look at what the program has brought to the table in the last year.
This all started when Steven Beer called about an artist he’d heard sing at a film festival, and invited me for a meeting at his office. Interestingly, there were two other producer/writers there as well—a bit unorthodox, but pretty much anything goes these days, so nothing really surprises me anymore. We discussed the artist’s interests, influences, and other variables, and then listened to some of my reel as well as music from the other producers. It turned out the lawyer’s master plan was to bring the three of us together to co-write, record, and mix a five-song EP before she went back to Finland in 45 days.
 Peppina already had some momentum in Finland from a loop she wrote and uploaded to a site called HITRECORD (owned by actor and director Joseph Gordon-Levitt). Her upload was so popular that Gordon-Levitt flew her to California to perform the piece at the Orpheum in LA during one of the show’s TV episodes. This all sounded good to me, so I signed on to a production team that would share in the production duties and heavy lifting. As to budgets…well, there was enough there for us to take it on as a challenge.
Continue reading “Anatomy of a Project: A Nontraditional Approach to a Commercial Recording”
Parallel Compression: Now Easier Than Ever
A few years back, we showed you a bit about Parallel Compression in SONAR. Now that we’ve introduced Patch Points in the Jamaica Plain update, you can do these same things with a much more efficient workflow.
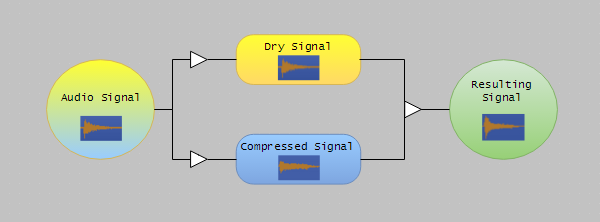
Let’s quickly define parallel processing: In parallel processing, a signal is duplicated into two or more signals. Each copy of the signal is processed differently but plays back simultaneously with the original. The copy/copies are then mixed together.
Parallel Compression, aka “New York Compression,” is most commonly used on drums to add body to the drum mix without flattening the snappy transients.
Check out the video below to see just how easy (and great sounding) this technique can be:
| You might also like… | |
|---|---|
 |
 |
| 5 TOOLS TO GET “THAT ANALOG SOUND” FROM SONAR | UNIVERSAL ROUTING TECHNOLOGY 202: THE AUX TRACK |
5 Tools To Get "That Analog Sound" From SONAR
With the advent of digital audio, some feel a certain quality associated with the analog signal path has been lost. While that may have been true at one point, analog emulations have come a long way since first introduced. Let’s find out how to add that “analog sound” using some of SONAR’s plugins. (Note: Many of the following examples use features are exclusive to SONAR Platinum, so if you don’t already have this version, you can try a free demo by clicking here.)
#5 – ProChannel Tape Emulation
Tape does some pretty magical things to audio, so SONAR Platinum includes tape emulation as a ProChannel module. Best of all, you can use it as much as you like without having to clean the heads!
Here’s how tape emulation enhances the sound:
- Emulates the “head bump” of analog tape to enrich the low end, adding subtle warmth
- Smooths response by slightly rolling off lowest lows and highest highs
- Increases sustain by smoothing peaks
- Saturates the signal in a non-linear, analog manner
- Optionally introduces high-frequency hiss
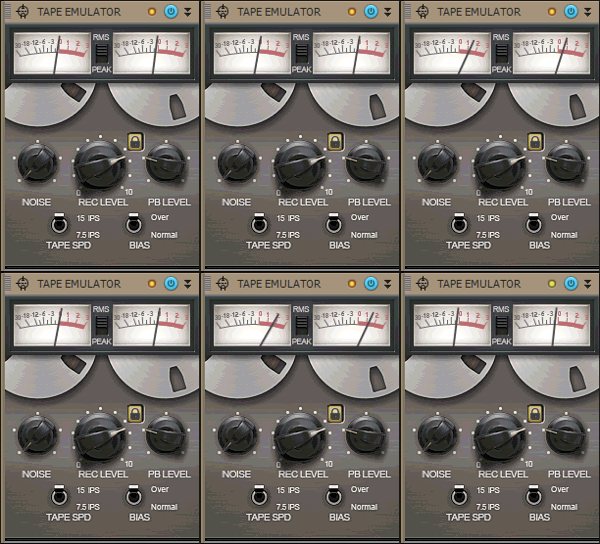
For a basic application, insert the Tape Emulator in the Master Bus ProChannel. You’ll immediately hear a more cohesive mix. Increasing the REC LEVEL increases the overall saturation. The REC LEVEL knob, TAPE SPD switch, and BIAS switch all interact in unique ways, so try out different combinations to hear how they affect each other.
After hearing how the Tape Emulator affects your sound, try applying it to individual tracks (your drums will sound particularly fabulous). This will be a more subtle effect, adding a sense of depth to the overall mix.
Continue reading “5 Tools To Get "That Analog Sound" From SONAR”
Using Cakewalk Drum Replacer: The “Right” Way and The “Other” Way
The “Right” Way:
There’s more than one way to use Drum Replacer to trigger your drum sounds. Which of these you choose will depend on the material, as well as your preferred outcome and workflow. First, let’s take a look at some of the intended, more traditional uses of Drum Replacer.
A mixed drum track or loop
A fairly standard Drum Replacer use is to augment or altogether change the drum sounds on an already-mixed drum track. The examples below play an unprocessed SONAR drum loop, followed by the same loop reinforced by Drum Replacer.
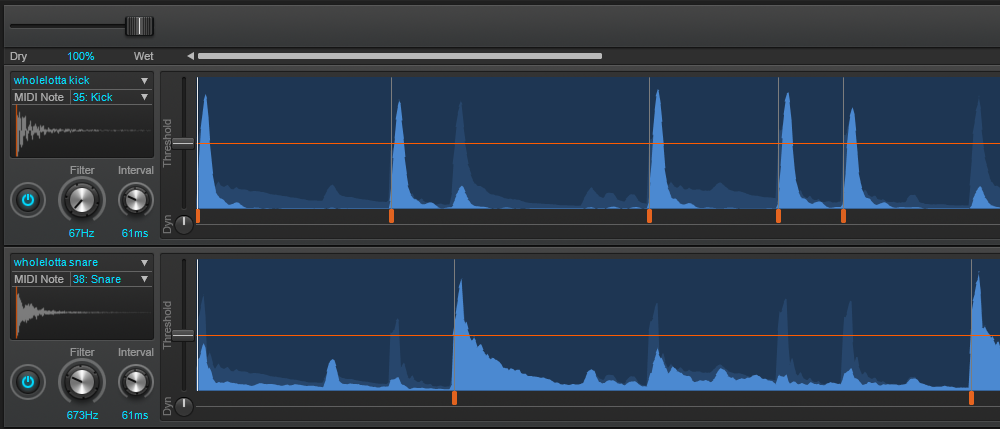 With the built-in filter mechanism, it’s easy to isolate each piece of the drum kit and replace it individually. For this particular loop, focusing the filters to 67 Hz for the kick and 673 Hz for the snare ensured replacing the right sound. I wanted to soften this already-punchy loop by replacing the kick and snare sounds with something a little more “airy,” then blending these with the original. I chose the included WholeLotta Kick and WholeLotta Snare samples for their lighter, more pillowy qualities and blended them roughly 70/30 with the original drum track. Combined, they create a pleasantly complex, tight-yet-sustained sound.
Continue reading “Using Cakewalk Drum Replacer: The “Right” Way and The “Other” Way”
Addictive Drums 2 Sounds Like a Real Drummer, But How?
by Dan Gonzalez
Every once in a while there are some plugins that come along and completely change the way we do things. Sometimes it’s a different look on processing, or maybe a utility that increases workflow ten-fold. Drum plugins have become all the rage recently, and Addictive Drums 2 is at the forefront of this revolution. There are a few reasons why Addictive Drums 2 (now available in SONAR Professional and SONAR Platinum) sounds like a real drummer, so let’s check those out.
Extensive and sophisticated velocity scaling
Within Addictive Drums 2 there is a powerful Map Window that exposes some of the more sophisticated elements of the XLN’s engine. Here you can choose to do various things to customize the way you interact with Addictive Drums 2. But within this window there is a dedicated velocity curve stage for every single sample that XLN audio supplies.
Select one of your kitpieces from the neighboring section and you can use this menu to choose how you want to control the way Addictive Drums 2 individually treats every drum or cymbal hit’s velocity. You can even grab one of the existing velocity presets and adjust it to your liking.
Customized and pre-designed velocity curves
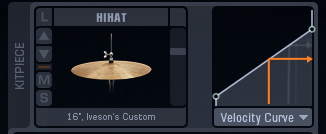
When you strike a note on your MIDI controller or play a MIDI Continue reading “Addictive Drums 2 Sounds Like a Real Drummer, But How?”
Drum Maps for Addictive Drums 2 in SONAR
by Joey Adams
Drum Maps are a powerful tool for taking all the guesswork out of editing your MIDI drum tracks. By using Drum Maps, you are able to see exactly which MIDI Notes trigger which sounds in your VST drum kit.
The purpose of this particular Drum Map is to allow you to see the relationship between MIDI notes and drum kit pieces of Addictive Drums 2, a VST Instrument included with your SONAR Professional and SONAR Platinum software.
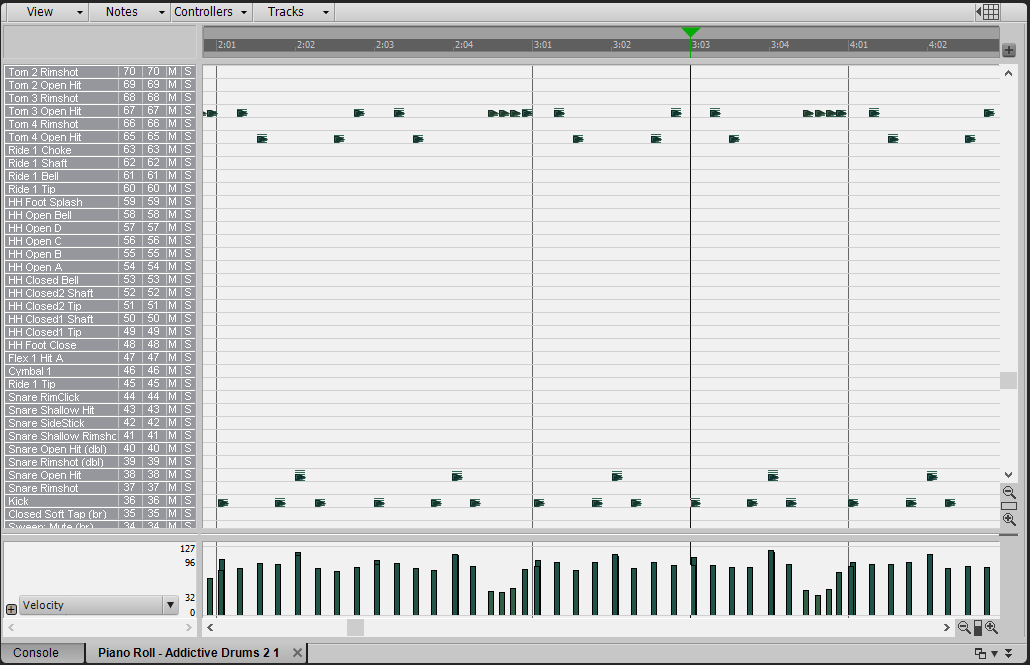
Here is what editing MIDI in Piano Roll view looks like without a Drum Map:
Here is the same exact MIDI data viewed with a Drum Map. Now you can see exactly which pieces of the drum kit are in use:
Step 1 – Download the files you’ll need
To get started you will want to download the Continue reading “Drum Maps for Addictive Drums 2 in SONAR”


