by Dan Gonzalez
A word on Vocal FX
 Mixing vocals is a tricky process since it is the most prominent element in any song. Vocals can be processed a very specific way to achieve an effect of sorts – or they can be processed in subtle ways to fit nicely into an overall mix. Most of the time you’ll be dealing with the latter of the two so it’s important to figure out ways to enhance your vocals without overpowering the other instruments.
Critical attention to detail is what makes any track sound like a polished mix and to achieve this a lot of engineers approach each section, instrument, entrance, exit, etc. dynamically. Obviously one way to do this is by mixing with tons of automation, but there are other ways to setup your mix so that you don’t have to write loads of automation data.
Setting up a dynamic vocal effect
Let’s take a pretty dry vocal track and add a dynamic effect to it. Here’s an example of a verse that we can use.
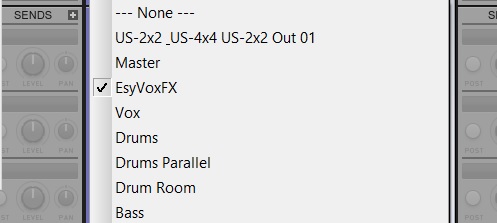
First, add a send onto your vocal track. The easiest way to do this is by selecting New Stereo Bus from the dropdown menu when you add a send in the Console View. Leave the level where it is.
On the New Stereo Bus, name it something that you’ll be able to quickly reference. Open and activate the ProChannel and add the PC4K-Bus Compressor. Add an FX Chain ProChannel module and the new REmatrix Solo ProChannel module.
 Rearrange the ProChannel modules so that the FX Chain is first, then REmatrix Solo, Quad Curve EQ, then the Bus Compressor. Switch the Bus Compressor’s sidechain so that it’s IN. This will make this sidechain input routable.

Next, go back to the original vocal track and add a send routed to the PC4K Bus Compressor sidechain input. After that, set the send to pre-fader – which means that the send is unaffected by the volume fader setting on that track. Technically we’re ducking a the vocal’s effect bus with itself. You’ll see why in a moment.

Add the Blue Tubes 3D Delay. Turn off the left and right delays and only use the middle one. For my delay effect I cranked the Level to 100, Feedback to 20, Note is set to Quarter note values, and the SYNC to host tempo is enabled.

After that, I picked the Big Dark Plate preset from the dropdown in REmatrix Solo and set the Wet/Dry fader to my liking.
On the PC4K Bus Compressor I set the Threshold to its lowest setting, a 0.7ms attack and 0.8ms release. This is the setting that fit the best for the tempo of my song. Your results will vary – but try and adjust these settings so that they are as natural as possible.
You’ll see in the images for the chain that I added some EQ to filter out the low stuff on this vocal track’s reverb. Again, this is preference – so it’s up to you if you’d like to apply this or not.
The Effect, Explained
So what’s happening here? Well it’s more simple than it looks. We are creating a delay and reverb effect that only occurs when the vocalist is NOT singing. The sidechain that is sent to the compressor allows us to duck the vocal effect during phrases so that the effect does not get in the way of anything that’s happening to the vocals.
Your vocal effect will start to sound something like this:
Learn more about Vocal Mixing features in SONAR here.


