Basics: Five Questions about Filter Response

By Craig Anderton 

You can think of filters as combining amplification and attenuation—they make some frequencies louder, and some frequencies softer. Filters are the primary elements in equalizers, the most common signal processors used in recording. Equalization can make dull sounds bright, tighten up “muddy” sounds by reducing the bass frequencies, reduce vocal or instrument resonances, and more. 

Too many people adjust equalization with their eyes, not their ears. For example, once after doing a mix I noticed the client writing down all the EQ settings I’d done. When I asked why, he said it was because he liked the EQ and wanted to use the same settings on these instruments in future mixes. 

While certain EQ settings can certainly be a good point of departure, EQ is a part of the mixing process. Just as levels, panning, and reverb are different for each mix, EQ should be custom-tailored for each mix as well. Part of this involves knowing how to find the magic EQ frequencies for particular types of musical material, and that requires knowing the various types of filter responses used in equalizers. 

What’s a lowpass response? A filter with a lowpass response passes all frequencies below a certain frequency (called the cutoff or rolloff frequency), while rejecting frequencies above the cutoff frequency (Fig. 1). In real world filters, this rejection is not total. Instead, past the cutoff frequency, the high frequency response rolls off gently. The rate at which it rolls off is called the slope. The slope’s spec represents how much the response drops per octave; higher slopes mean a steeper drop past the cutoff. Sometimes a lowpass filter is called a high cut filter.

 Fig. 1: This lowpass filter response has a cutoff of 1100 Hz, and a moderate 24/dB per octave slope.

What’s a highpass response? This is the inverse of a lowpass response. It passes frequencies above the cutoff frequency, while rejecting frequencies below the cutoff (Fig. 2). It also Continue reading “Basics: Five Questions about Filter Response”

DEVELOPER NOTES – SONAR X3 QUADCURVE EQ (UI ENHANCEMENT)

Introduction

Since it first appeared in SONAR X1 Producer, the QuadCurve EQ has become my go to EQ. That’s saying something given the abundance of killer plugins in my collection (yes, like many of us, I own far too many plugins).

Maybe I’m just lazy, but I love the fact that it’s always there, ready to go on any track or bus at a moments notice. No need to wade through plugin menus – it’s already waiting patiently in the ProChannel.

And it’s no slouch either. There’s no trade-off for that convenience. The QuadCurve EQ is up there with the best of them.

But, as much as I love it, I admit I have, in the past, occasionally found myself reaching for one of the alternative plugins in my arsenal.

Why? The QuadCurve EQ user interface could be, well, a bit cramped. The small EQ plot is fine for quick adjustments, but not so great for fine-tuning. Metering is also important to me, which the QuadCurve EQ was lacking.

The good news? SONAR X3 Producer addresses these issues, and much more besides.

So what’s new?

See me!

First off, it’s easier on the eyes. The UI is cleaner, clearer, and you no longer need a magnifying glass to read the knob values!

Then there’s the EQ plot, or should that be “plots”? The small ProChannel plot is still there of course, and it’s as useful as ever, but now there’s a new secret weapon at your disposal…

…the QuadCurve EQ Zoom Window:

As you can see, it’s essentially a much larger EQ user interface which, among other benefits, provides a much finer degree of control.

I say ‘secret weapon’ because it may not be immediately obvious how to get to it Continue reading “DEVELOPER NOTES – SONAR X3 QUADCURVE EQ (UI ENHANCEMENT)”

SONAR X3 Quicktip: Focus the Low end of your Kick and Snare with a Program EQ

Program Equalizers have been around since the 1950’s and in SONAR X3 Studio and Producer users will receive two of these incredibly emulated modules.

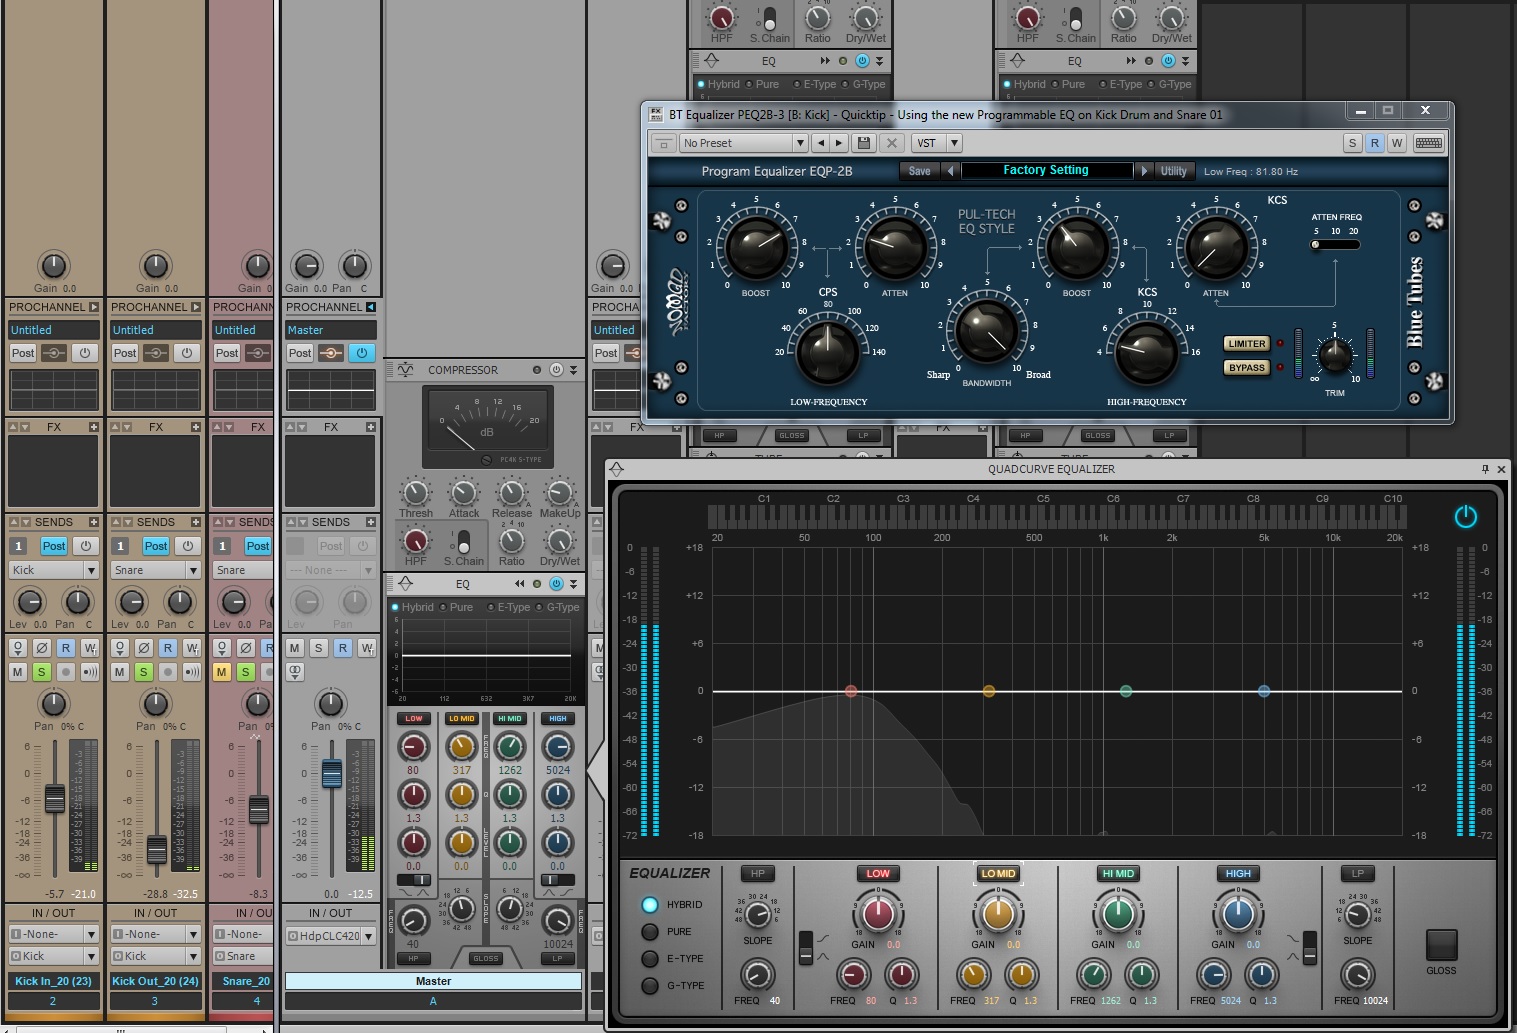
Let’s take a look at what the new Program Equalizer EQP-2B can do for our kick drum. You’ll notice that we have the ability to both boost and cut the same frequencies on this EQ. Choose a low frequency from the variable adjustment and then begin increasing the Boost parameter.  Increase it all the way and your kick drum signal will become quite overpowering. Adjust the Attenuate knob and the signal will begin to smooth out and focus your signal a bit better.

For this country kick drum I picked 80Hz for the low end and boosted the signal to it’s ceiling.  Next, I adjusted the Attenuate knob to it’s lowest setting. This effectively sharpens out the boosted signals and gives the signal a unique focus in the lower spectrum. After that, I adjusted for clarity and the end result is very useable.

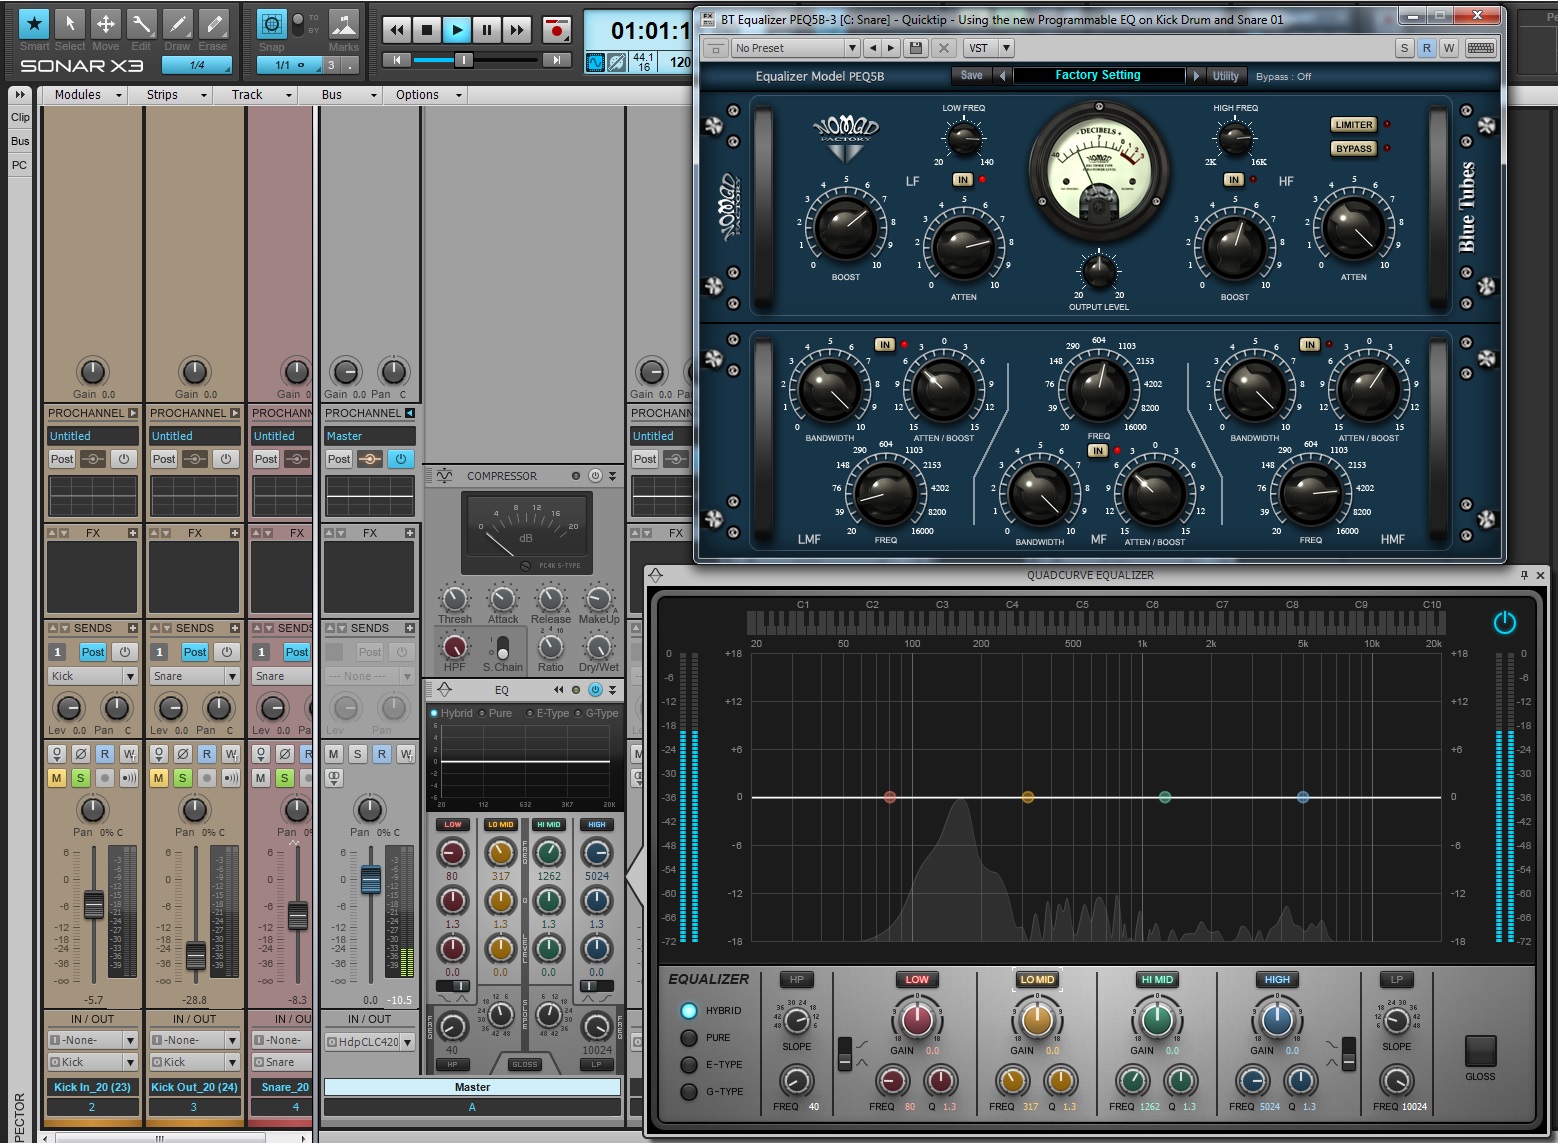
Moving to the snare, user’s can get the same effect using the PEQ5B.  This has some of the same algorithms as the EQP-2B but with an added EQ section in the bottom of the plugin. At first listen the Snare sounds a bit boxy and grainy in the low and mid-range.

I applied a sharp reduction around 50HZ with the Low Shelving EQ and then another sharp cut around 800Hz.  This seemed to make all the difference. Afterwards, I moved to the upper half of this EQ and applied the same thinking that I did to the Kick but instead I focused the EQ to around 122HZ.  This will allow the snare to get out of the way of the Kick.  Next, boosting and then attenuating the signal seemed to focus the shape of the Snare right where I needed it.

Learn more about these plugins and SONAR X3 here.